Share your network to a Mivo Device
Share Your Network with the MIVO Device#
Before you start:
Disable LTE as the default connection
Before sharing your PC's internet connection with the MIVO device, make sure that Use as Default Connection is disabled for LTE on the MIVO device.
Navigate to:
System → Network → LTE
Make sure that Use as Default Connection is unchecked.
If this option is enabled, the MIVO device will continue to use LTE as its default
Ensure that the MIVO device is powered on and has a power supply.
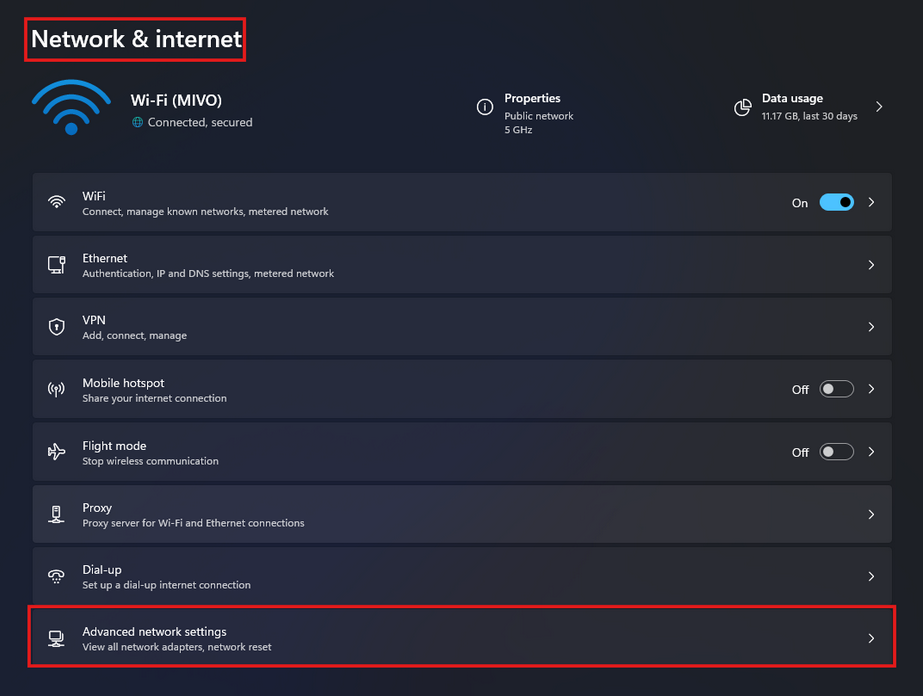
- Open your PC’s settings and select “Network & Internet.”
-
Click on “Advanced network settings” to access more options.
-
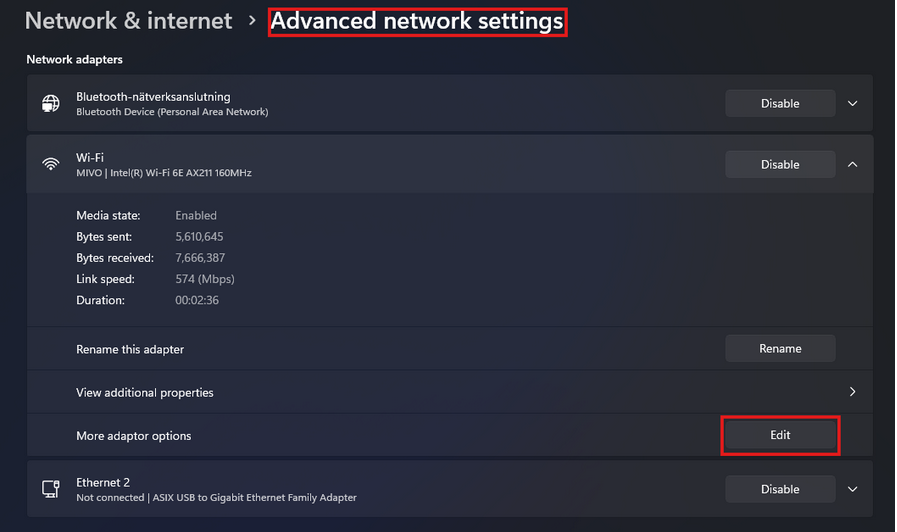
Identify the network port you will use to share your PC’s Wi-Fi.
(In this guide, we are using "Ethernet 2.") -
Expand the “Wi-Fi” tab and select “More network adapter options.”
-
Click “Edit” to open the “Wi-Fi Properties” tab.
-
Under the “Sharing” tab, check “Allow other network users to connect through this computer’s internet connection.”
-
Select the port you want to share from, in this case, “Ethernet 2.”
-
Connect the MIVO's WAN port to the selected port on your PC.
-
The WAN port should light up green, and the network status LED should be solid blue (or green, depending on the version).
-
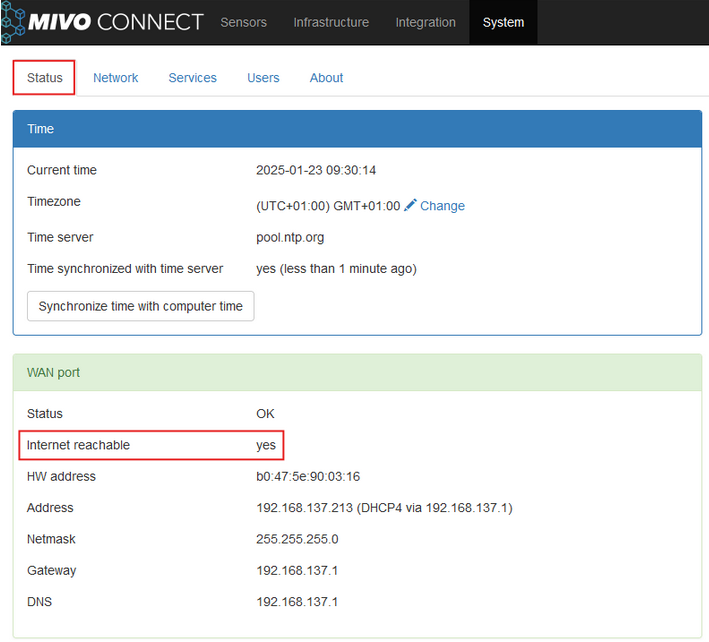
To confirm that your MIVO is connected to the internet, navigate to:
System View -> Status -> WAN Port -> Internet reachable =yes