System settings
Share Your Network with the MIVO Device#
Before you start:
Ensure that the MIVO device is powered on and has a power supply.
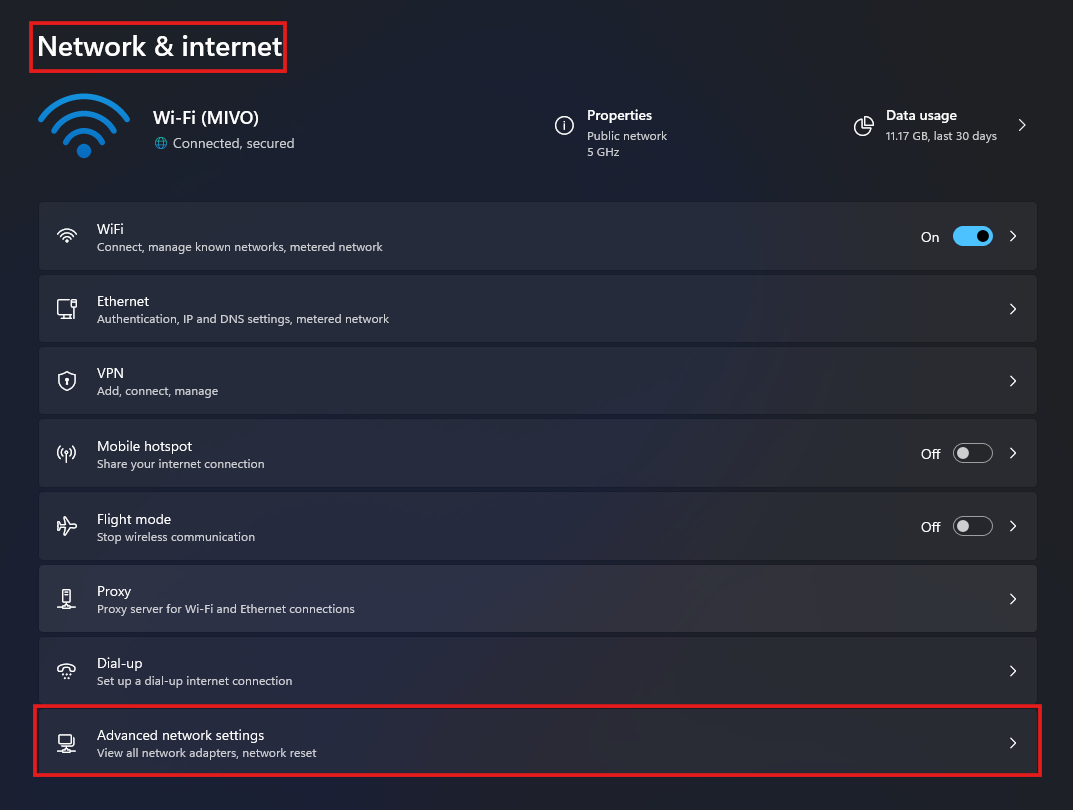
- Open your PC’s settings and select “Network & Internet.”
-
Click on “Advanced network settings” to access more options.
-
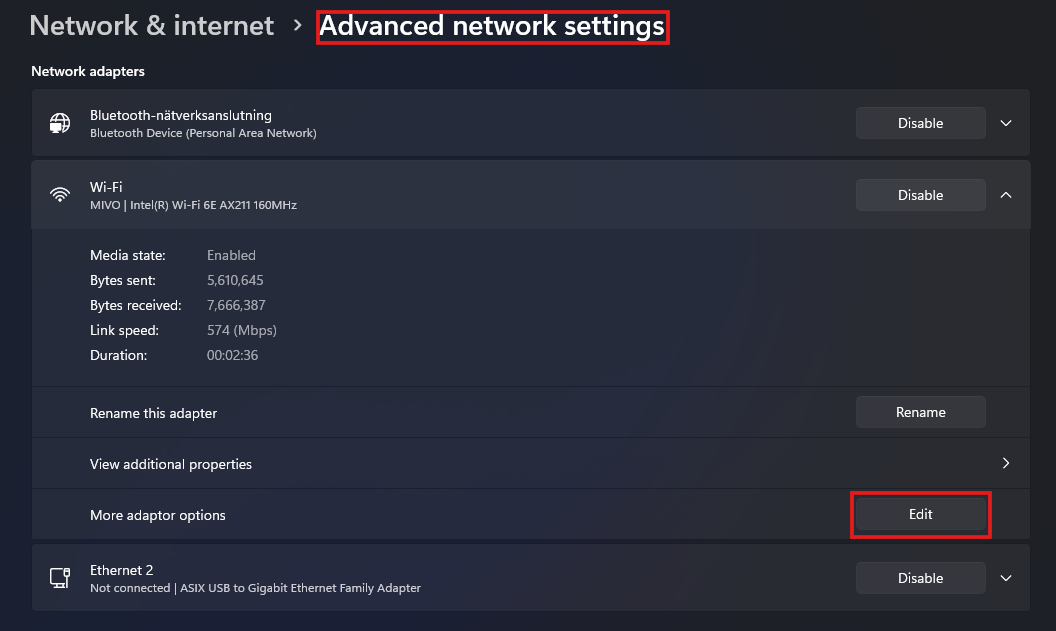
Identify the network port you will use to share your PC’s Wi-Fi.
(In this guide, we are using "Ethernet 2.") -
Expand the “Wi-Fi” tab and select “More network adapter options.”
-
Click “Edit” to open the “Wi-Fi Properties” tab.
-
Under the “Sharing” tab, check “Allow other network users to connect through this computer’s internet connection.”
-
Select the port you want to share from, in this case, “Ethernet 2.”
-
Connect the MIVO's WAN port to the selected port on your PC.
-
The WAN port should light up green, and the network status LED should be solid blue (or green, depending on the version).
-
To confirm that your MIVO is connected to the internet, navigate to:
System View -> Status -> WAN Port -> Internet reachable =yes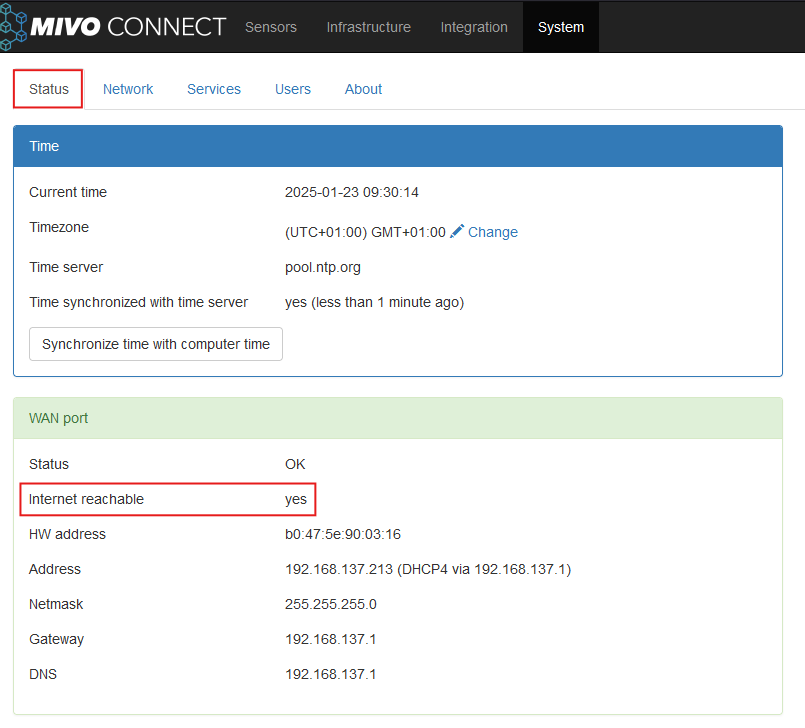
View IP Addresses on MIVO Connect#
To check the current IP addresses (WAN, LAN, LTE) on your MIVO Connect device:
- Open a web browser and enter the device's IP address.
- Log in as described in the guide.
- Once logged in, click "System" in the main menu.
- Select "Status" to view the network information.
- Under "Status", you will find:
| IP Type | Description |
|---|---|
| WAN | External IP for internet connection |
| LAN | Internal IP for your local network |
| LTE | IP address for the LTE connection (if applicable) |
Make sure to note these IP addresses if you plan to modify the settings.
Change Default IP Address Settings on MIVO Connect#
-
Open a web browser and enter the device's IP address. Refer to the Installation Guide for more information.
-
Log in according to the instructions in the installation guide.
-
Once logged in, click "System" in the main menu.
-
Select Network.
-
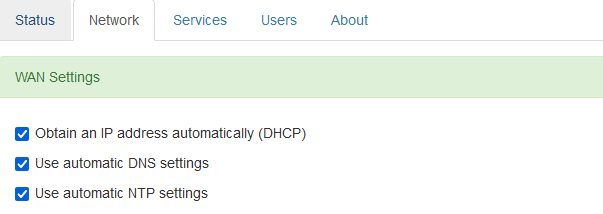
Go to the WAN Settings tab.
Under WAN Settings, there are three enabled options:
- Obtain an IP address automatically (DHCP)
- Use automatic DNS settings
- Use automatic NTP settings
-
Uncheck the boxes you want to disable.
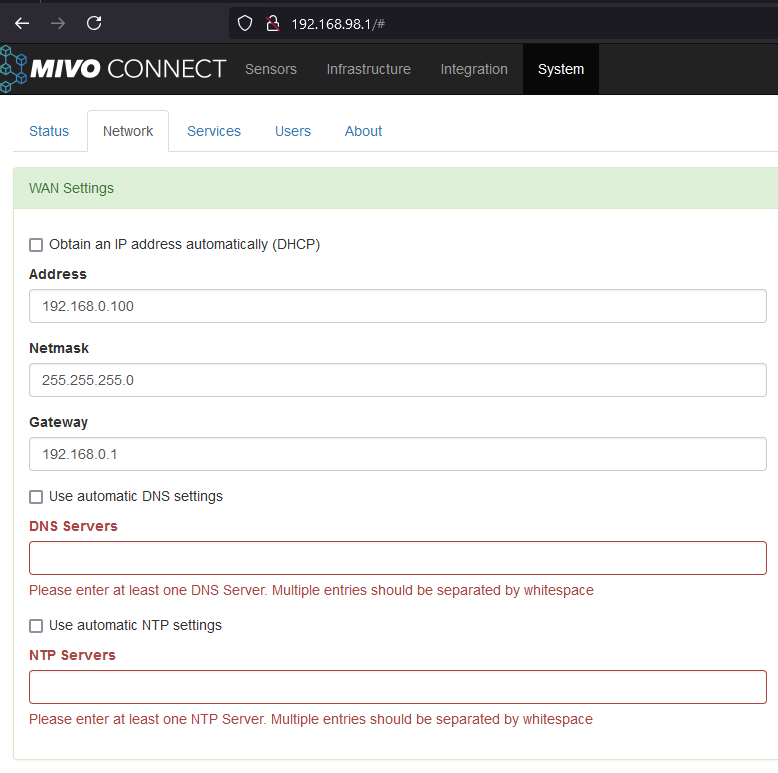
-
Once these are unchecked, you can manually enter a different IP address, DNS, and NTP settings if needed.
Note
Make sure to note/write down the new IP settings if you change them.
Change password#
We strongly recommend changing password during installation to limit unauthorized access. To change password Navigate to System -> Users and click edit on the user admin to change password.
